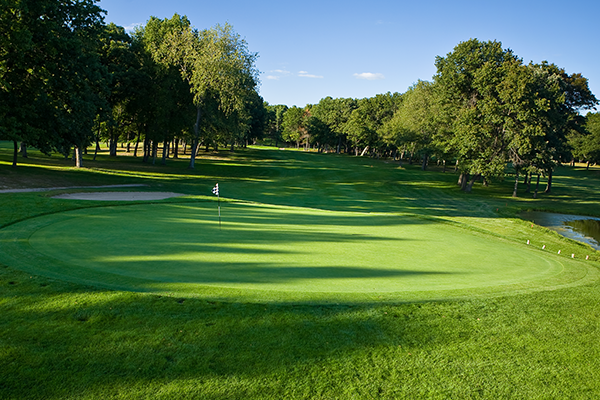
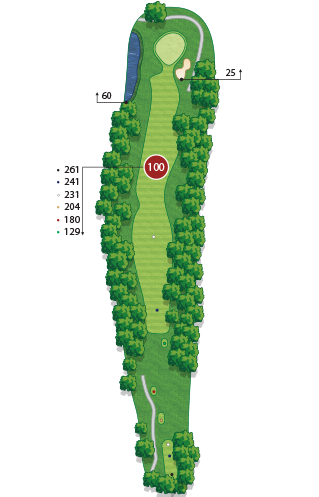
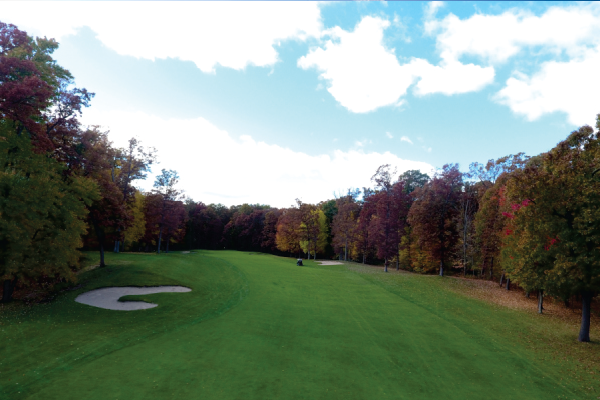
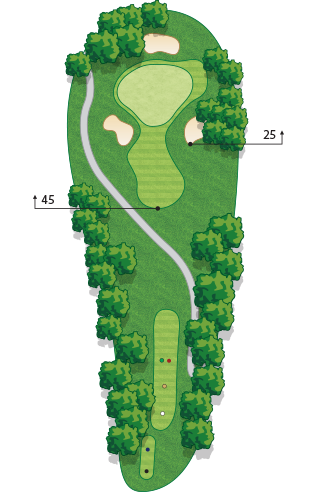
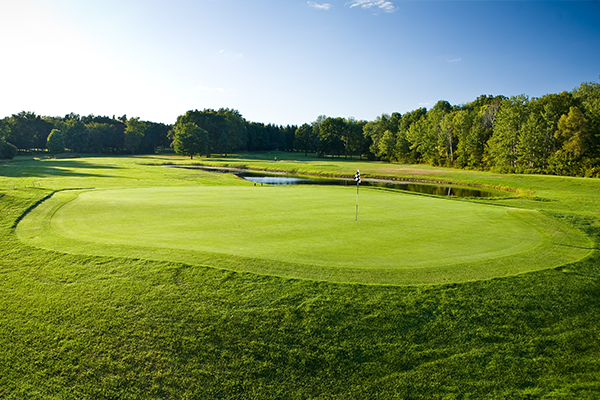
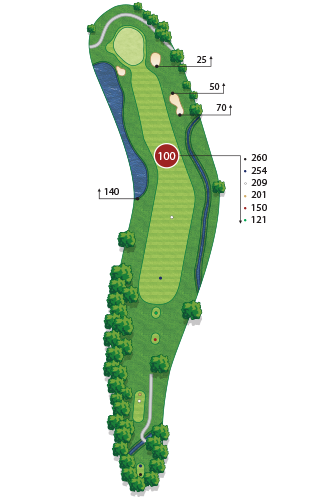
CANDLESTONE HOLE #1
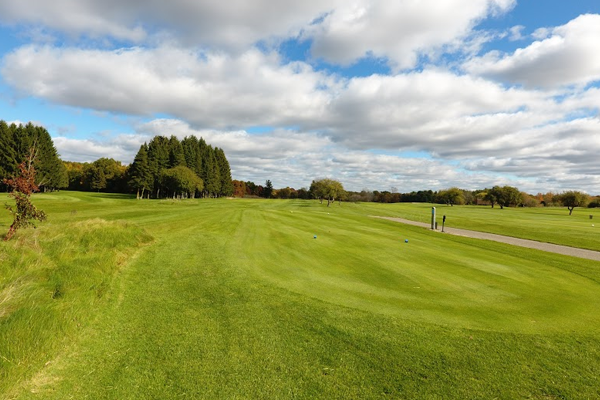
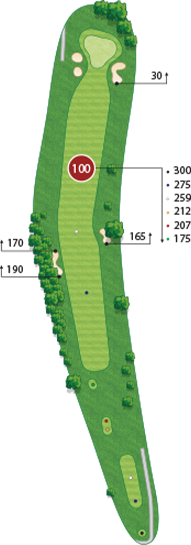
Tee Box Yardage
A short par 4 where pin placement is important to consider. Take a look at the pin placement that day to determine where you should hit your tee shot. If the pin is tucked behind one of the bunkers on the right or left you can aim your tee shot to have more access to the pin.
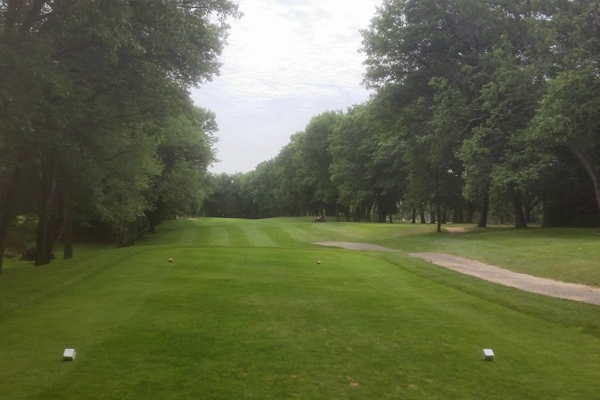
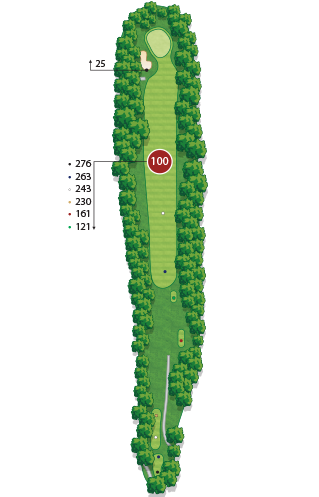
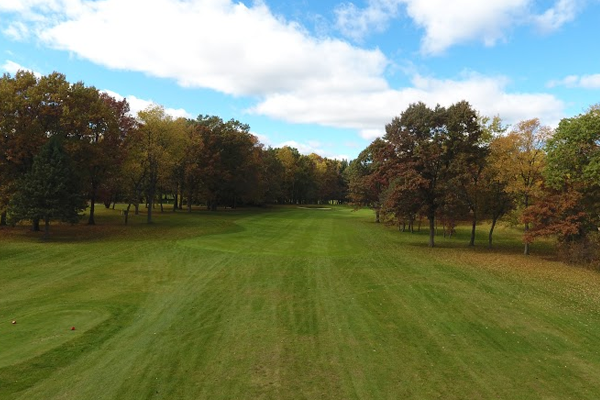
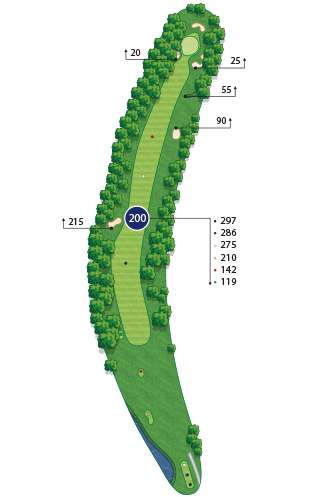
CANDLESTONE HOLE #2
Tee Box Yardage
Hole #2 tee’s shot is ideal down the right side of the fairway. This will give you a chance to reach the green in two shots. If not, the pines on your left block your second shot which then lay up to 100 yards out. Don’t forget to grab enough club to reach this elevated green.
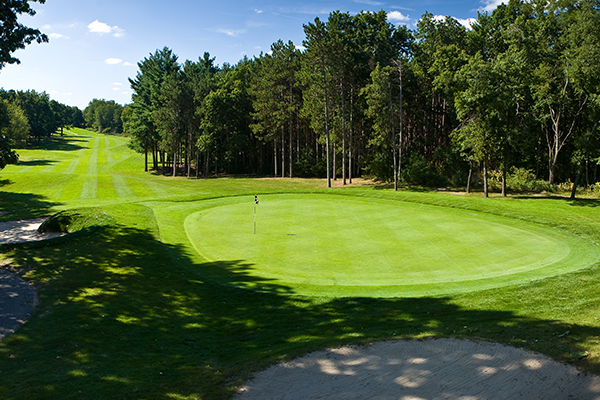
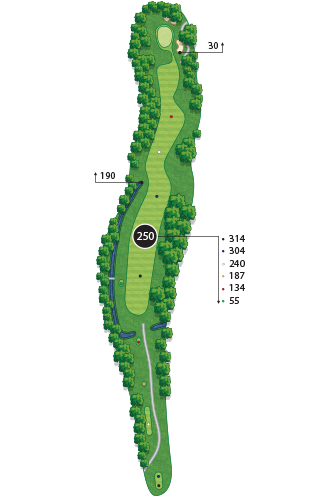
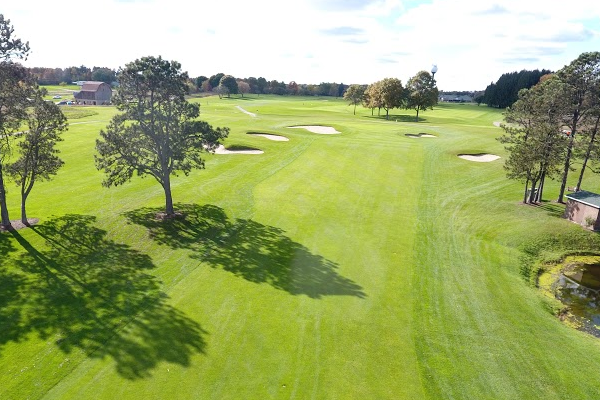
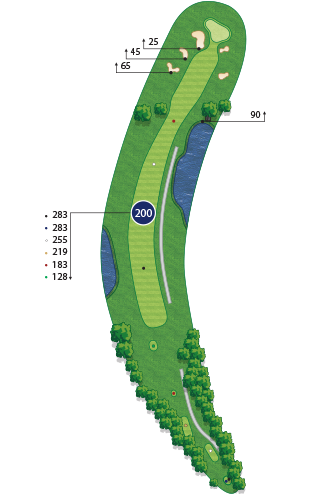
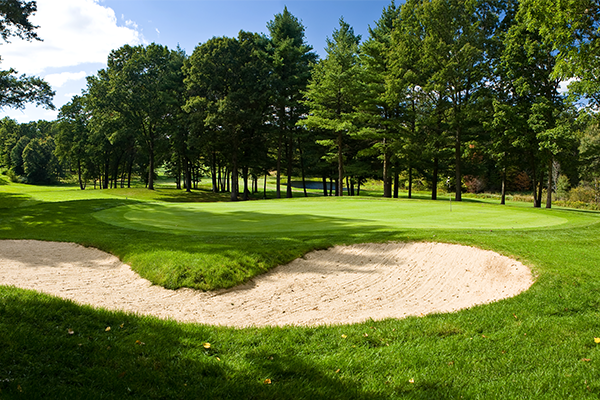
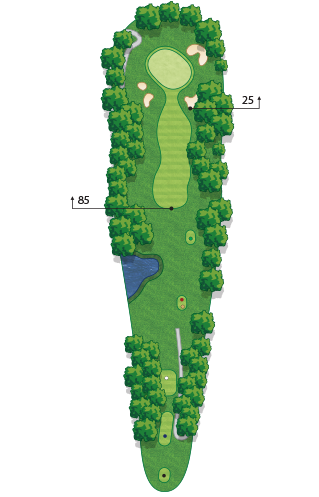
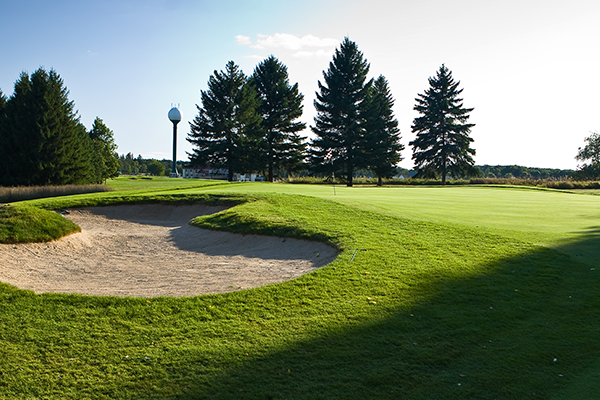
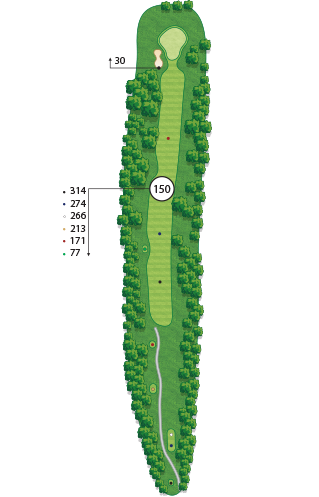
CANDLESTONE HOLE #3
Tee Box Yardage
The key on hole #3 is to not miss the green to the left. Bunkers guard the left side of the green and with the green sloping left to right makes it a very difficult up and down for par.
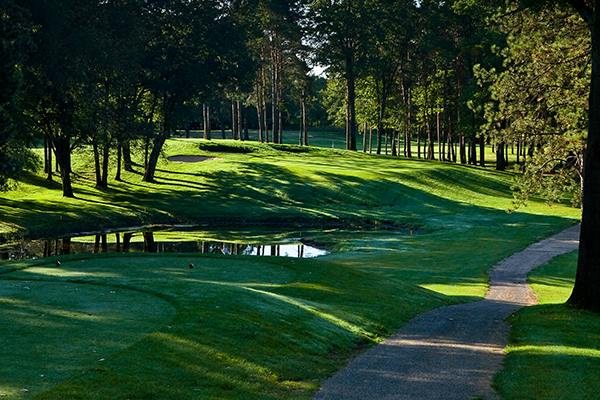
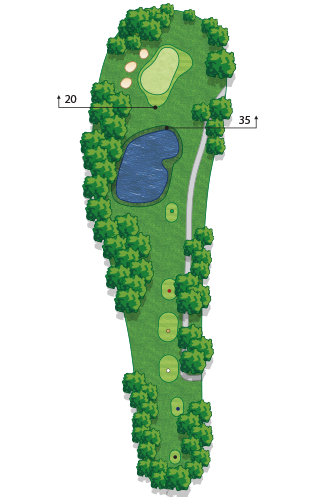
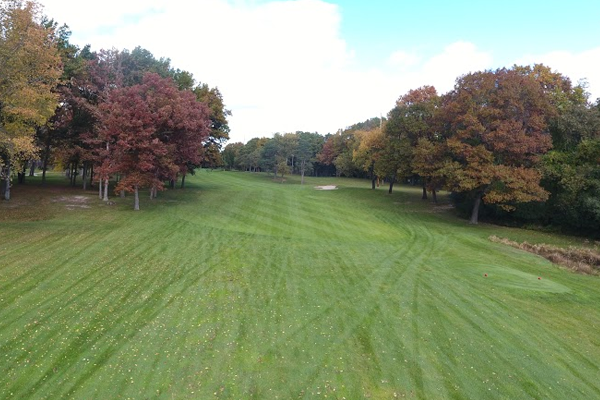
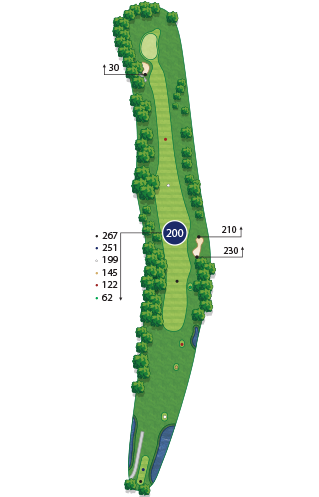
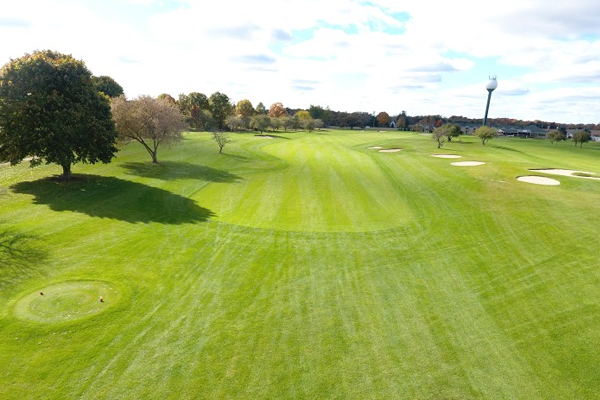
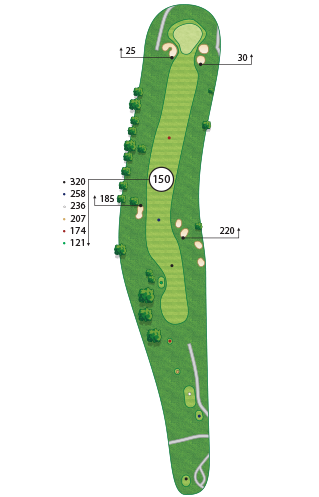
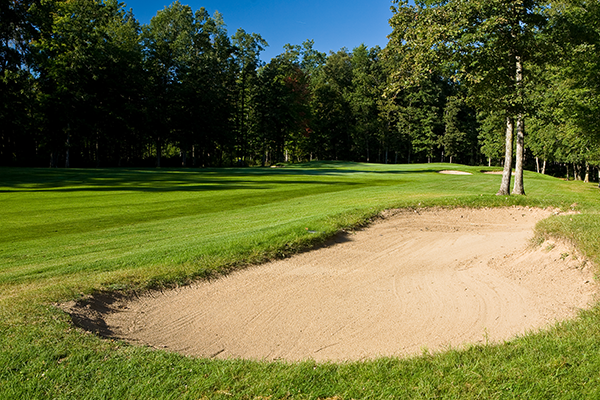
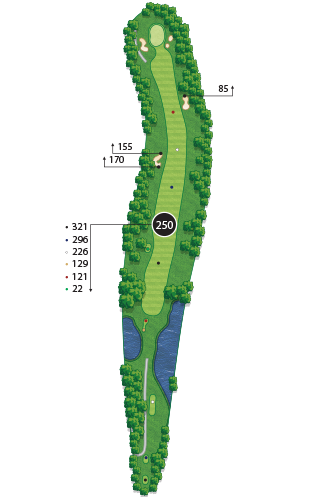
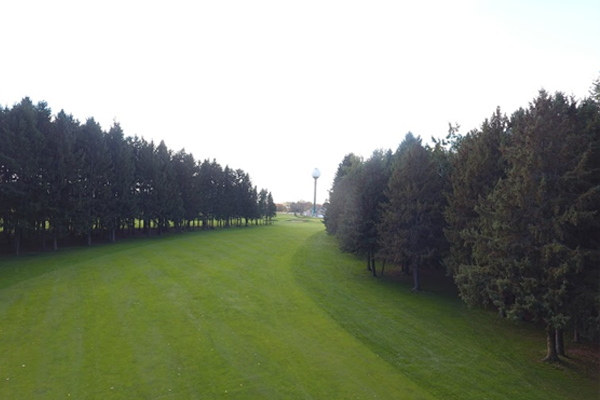
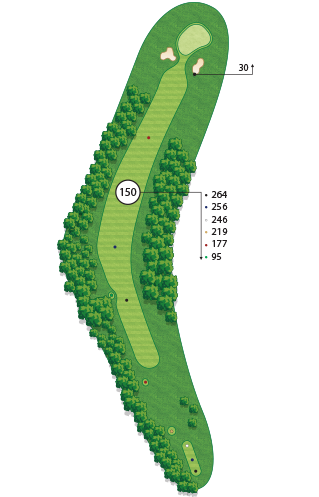
CANDLESTONE HOLE #4
Tee Box Yardage
A short par 4 that gives you a birdie opportunity with a good drive. Hard woods line a narrow fly which block you out if you hit into them off the tee.
CANDLESTONE HOLE #5
Tee Box Yardage
One of the most challenging par 4’s on the course, the tee shot favored to the right will help take out of play a very deep green side bunker that is on the left.
CANDLESTONE HOLE #6
Tee Box Yardage
The shortest par 3 on the course has three well placed bunkers that will test your club selection. Players should be thinking birdie on this hole.
CANDLESTONE HOLE #7
Tee Box Yardage
Club selection on the tee is very important when playing hole #7. It’s a risk/reward with the driver. Many play an iron off the tee to avoid the hard woods that make it very tricky to get out of if you hit into them.
CANDLESTONE HOLE #8
Tee Box Yardage
Club selection on the tee is very important when playing hole #7. It’s a risk/reward with the driver. Many play an iron off the tee to avoid the hard woods that make it very tricky to get out of if you hit into them.
CANDLESTONE HOLE #9
Tee Box Yardage
What makes #9 challenging is the bunkers and apple trees that line the right side of the hole along with out of bounds to the left. Again, wind is normally a factor as you are hitting into it which may make you consider clubbing up.
CANDLESTONE HOLE #10


Tee Box Yardage
Similar to hole #1 the par 4 10th is a short hole that golfers can take advantage of. Keep an eye on the pin placement and avoid the bunkers down the right and left side.
CANDLESTONE HOLE #11
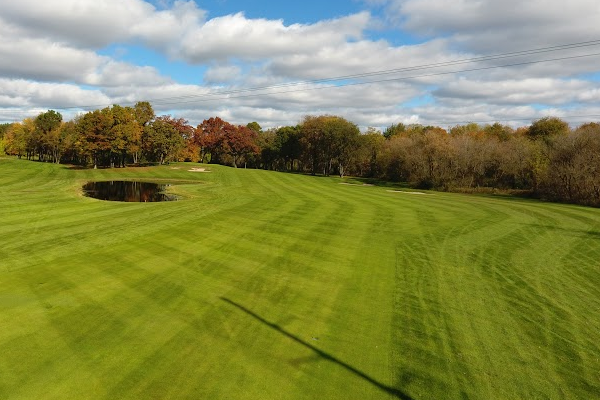
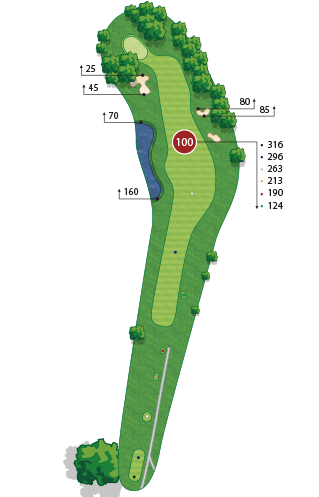
Tee Box Yardage
With a pond and a beautiful oak tree that is by the green, the tee shot here should favor the right side of the freeway. A two tiered green is protected by the biggest bunker on the golf course. Missing to the right in the rough will still give you a good angle at the green.
CANDLESTONE HOLE #12
Tee Box Yardage
Hole #12 has a big bunker on the right that can be tricky to get up and down if you end up in it. A lot of golfers come up short on this hole so make sure you chose the correct club.
CANDLESTONE HOLE #13
Tee Box Yardage
Another one of those risk reward tee shots. If you hit driver you can end up with a wedge in your hands but with a pond on the left and a creek to the right the safe choice is to hit an iron safely out into the fairway.
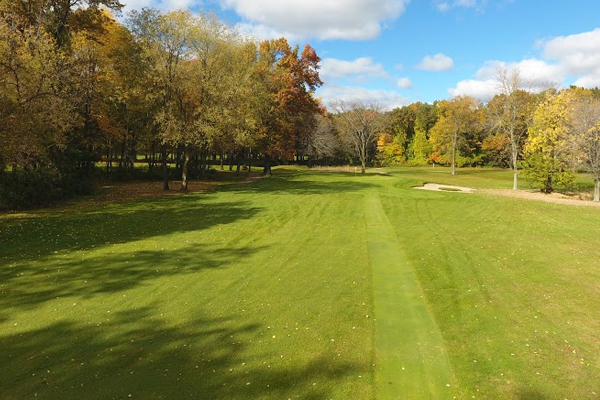
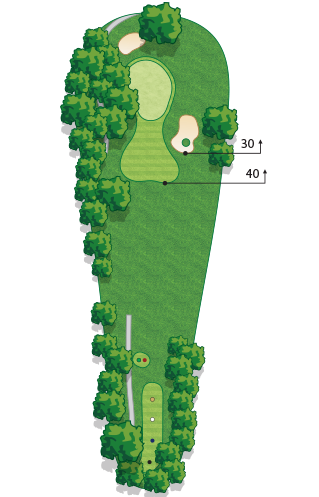
CANDLESTONE HOLE #14
Tee Box Yardage
With the tee shot here aim for the middle of the fairway and try to get past the oak tree on the corner of the dogleg. This will give you the tough decision of whether to to lay up or try to go to the green in two. Remember the hole really narrows from 100 yards in and with a lot of trees that comes in play.
CANDLESTONE HOLE #15
Tee Box Yardage
The hardest par 3 at Candlestone starts with what some consider the four toughest finishing holes in West Michigan. This has a small elevated green that has a ridge on the right that makes chipping onto the green difficult. A missed shot here leaves you scrambling for a par.
CANDLESTONE HOLE #16
Tee Box Yardage
A tee shot to the right rough will give a look at the green on this dogleg left. Otherwise with a blind second shot you could end up in one of the three green side bunkers. Make sure you are on the right tier with your approach shot if you happen to lay up.
CANDLESTONE HOLE #17
Tee Box Yardage
This hole looks straight forward from the tee but don’t let the length fool you. The second shot is uphill and typically into the wind so you will need to go up a club or two to ensure you make it to the green.
CANDLESTONE HOLE #18
Tee Box Yardage
Picking a point on this dogleg right is key to this tee shot. Most golfers aim at the “V” that is created by the pines or corner of the dogleg. Stay out of the pines or you will be chipping back out into the fairway and struggling to make par.